![]() As more and more companies are making the switch from OPC-DA to OPC UA, it is becoming increasingly important to be able to troubleshoot OPC UA communications. One of the easiest ways we’ve found here at Software Toolbox to analyze the communication between an OPC UA client and server is to use Wireshark. The following article discusses in detail how to use Wireshark for analyzing OPC UA packets for troubleshooting purposes.
As more and more companies are making the switch from OPC-DA to OPC UA, it is becoming increasingly important to be able to troubleshoot OPC UA communications. One of the easiest ways we’ve found here at Software Toolbox to analyze the communication between an OPC UA client and server is to use Wireshark. The following article discusses in detail how to use Wireshark for analyzing OPC UA packets for troubleshooting purposes.
Wireshark has a built-in filter for OPC UA, which will allow the capture of communications between OPC UA clients and servers. As long as the communication is not encrypted (meaning that no security is used), it is fairly easy to capture and analyze the conversation. This will allow troubleshooting of strange or unexpected behavior between the client and server.
1. Enabling the OPC UA filter
In order to make sure Wireshark actually captures the data, it has to be told which port to listen on. In Wireshark, go to “Edit -> Preferences” to open up the Preferences Window:

Then, under the “Protocols” section, find the “OpcUa” protocol and make sure to enter the port that your OPC UA server uses. The port can be found at the end of the OPC UA server’s endpoint URL. For example, if the endpoint is “opc.tcp://192.168.111.75:49380”, the port will be 49380.![]()
2. Starting the capture
Choose the correct Interface in Wireshark, and hit the “Start” button.
Note that Wireshark will record ALL traffic (not just OPC-UA) on the network interface that is selected. This is normal, and the OPCUA communications can be filtered out later.
3. Letting it run
Let the Wireshark run and capture the network traffic while the client and server are communicating. If the goal is to troubleshoot some problem between the client and server, now would be the time to reproduce the problem to make sure the behavior is included in the Wireshark capture. You should be seeing frames appear in Wireshark’s main window at this point (probably scrolling too fast to read – that’s ok!).
4. Analyze the capture
After a trace has been collected, it’s time to take a look at the communications to see what’s going on. In the “Filter” textbox, type “opcua”, and hit “Apply” to filter the trace to only show OPC UA communications. This removes all the irrelevant frames that we’re not interested in.
Once the filter is applied, all that is left is the OPC UA messages. An example output of OPC UA communications could look something like this: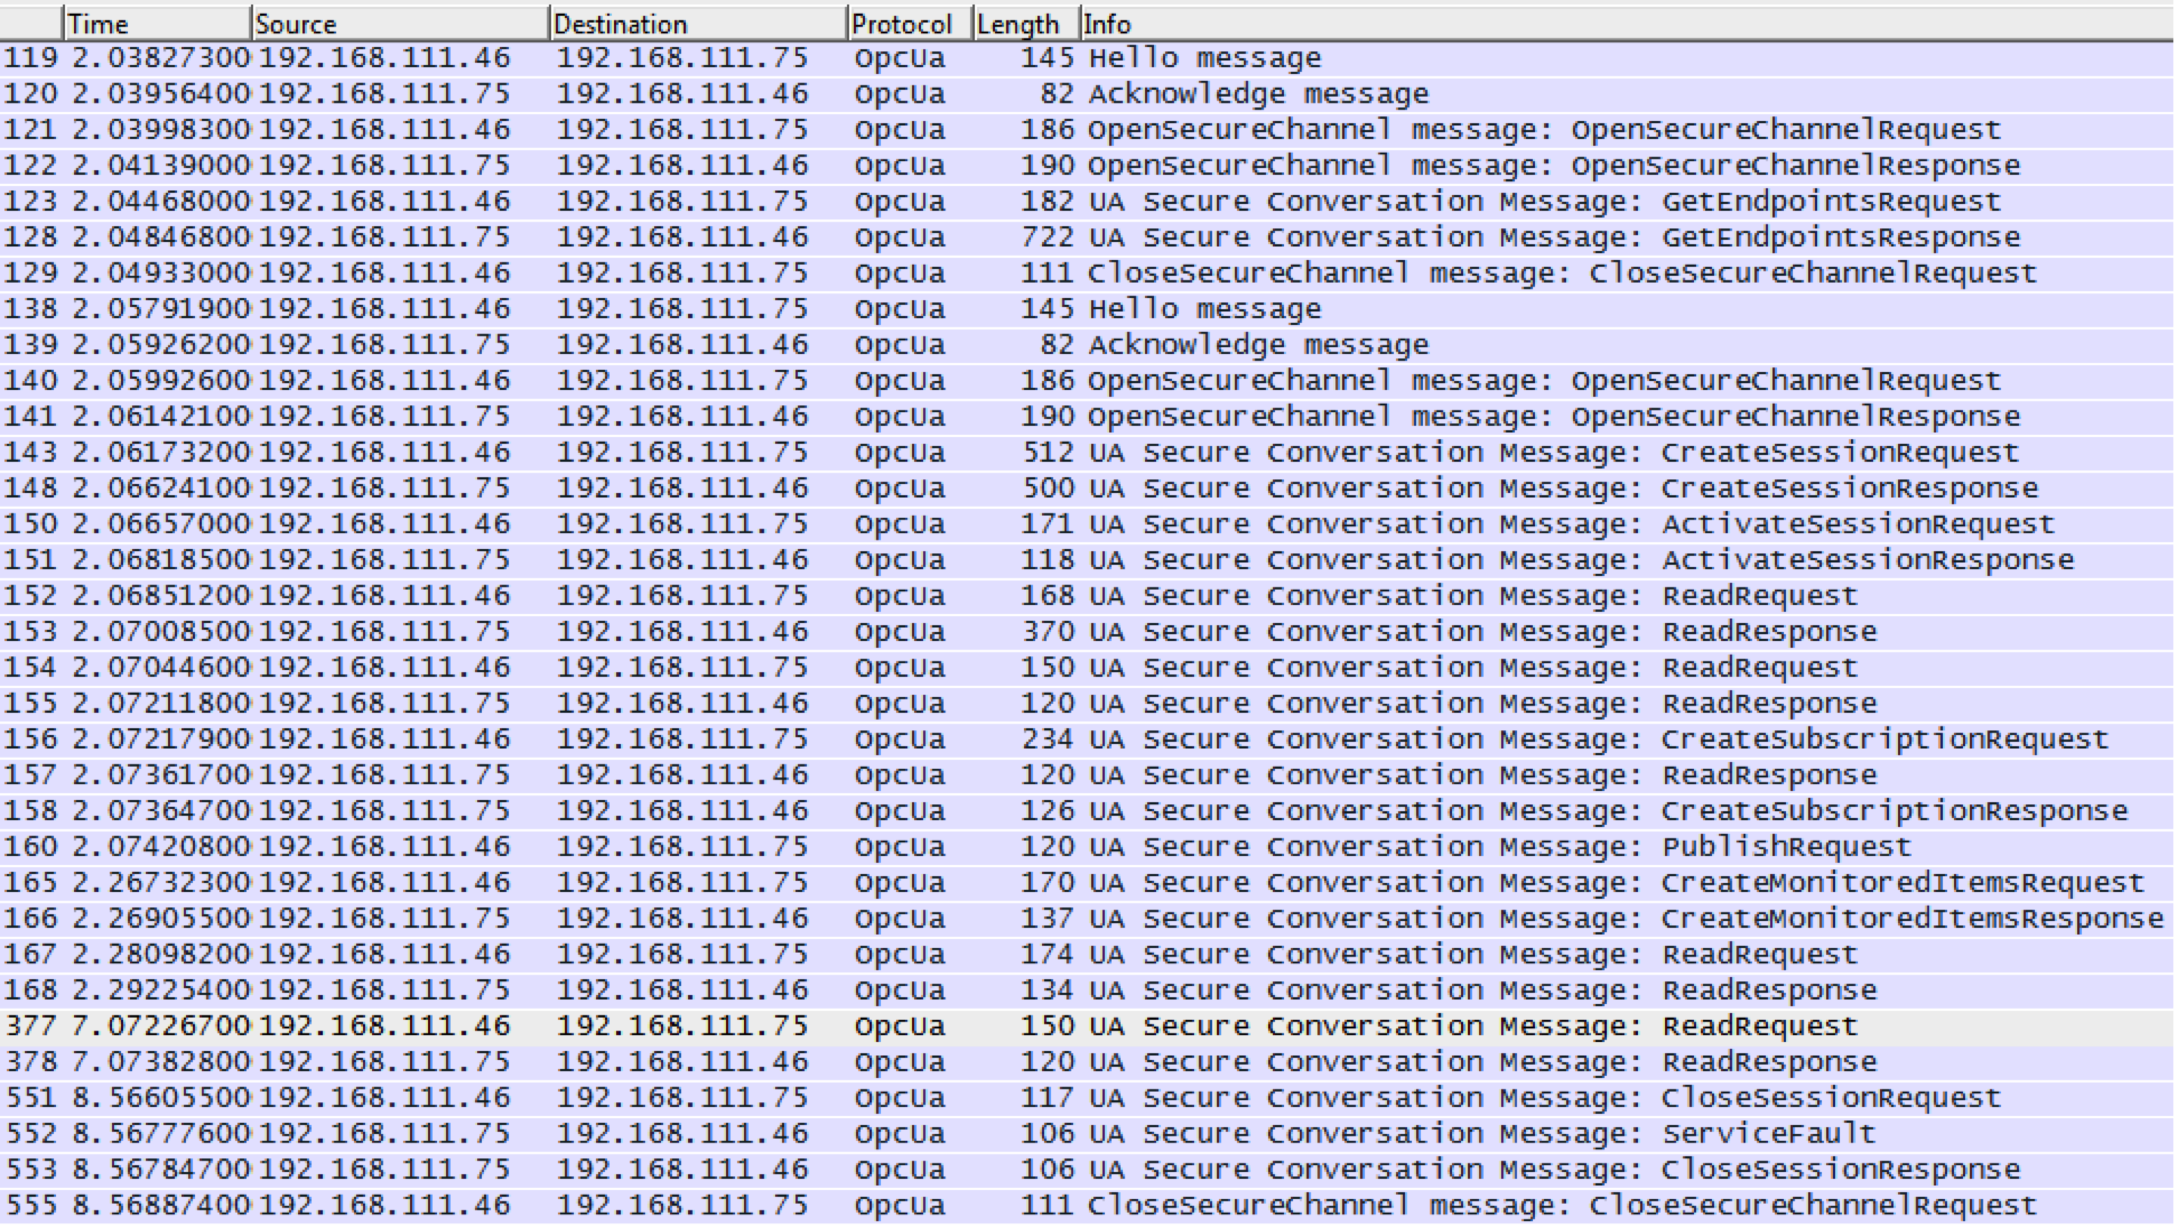
From there, it’s possible to select a message that is of interest (say a ReadRequest in frame 167 that is sent from the server to the client), and drill down to see exactly what is being requested.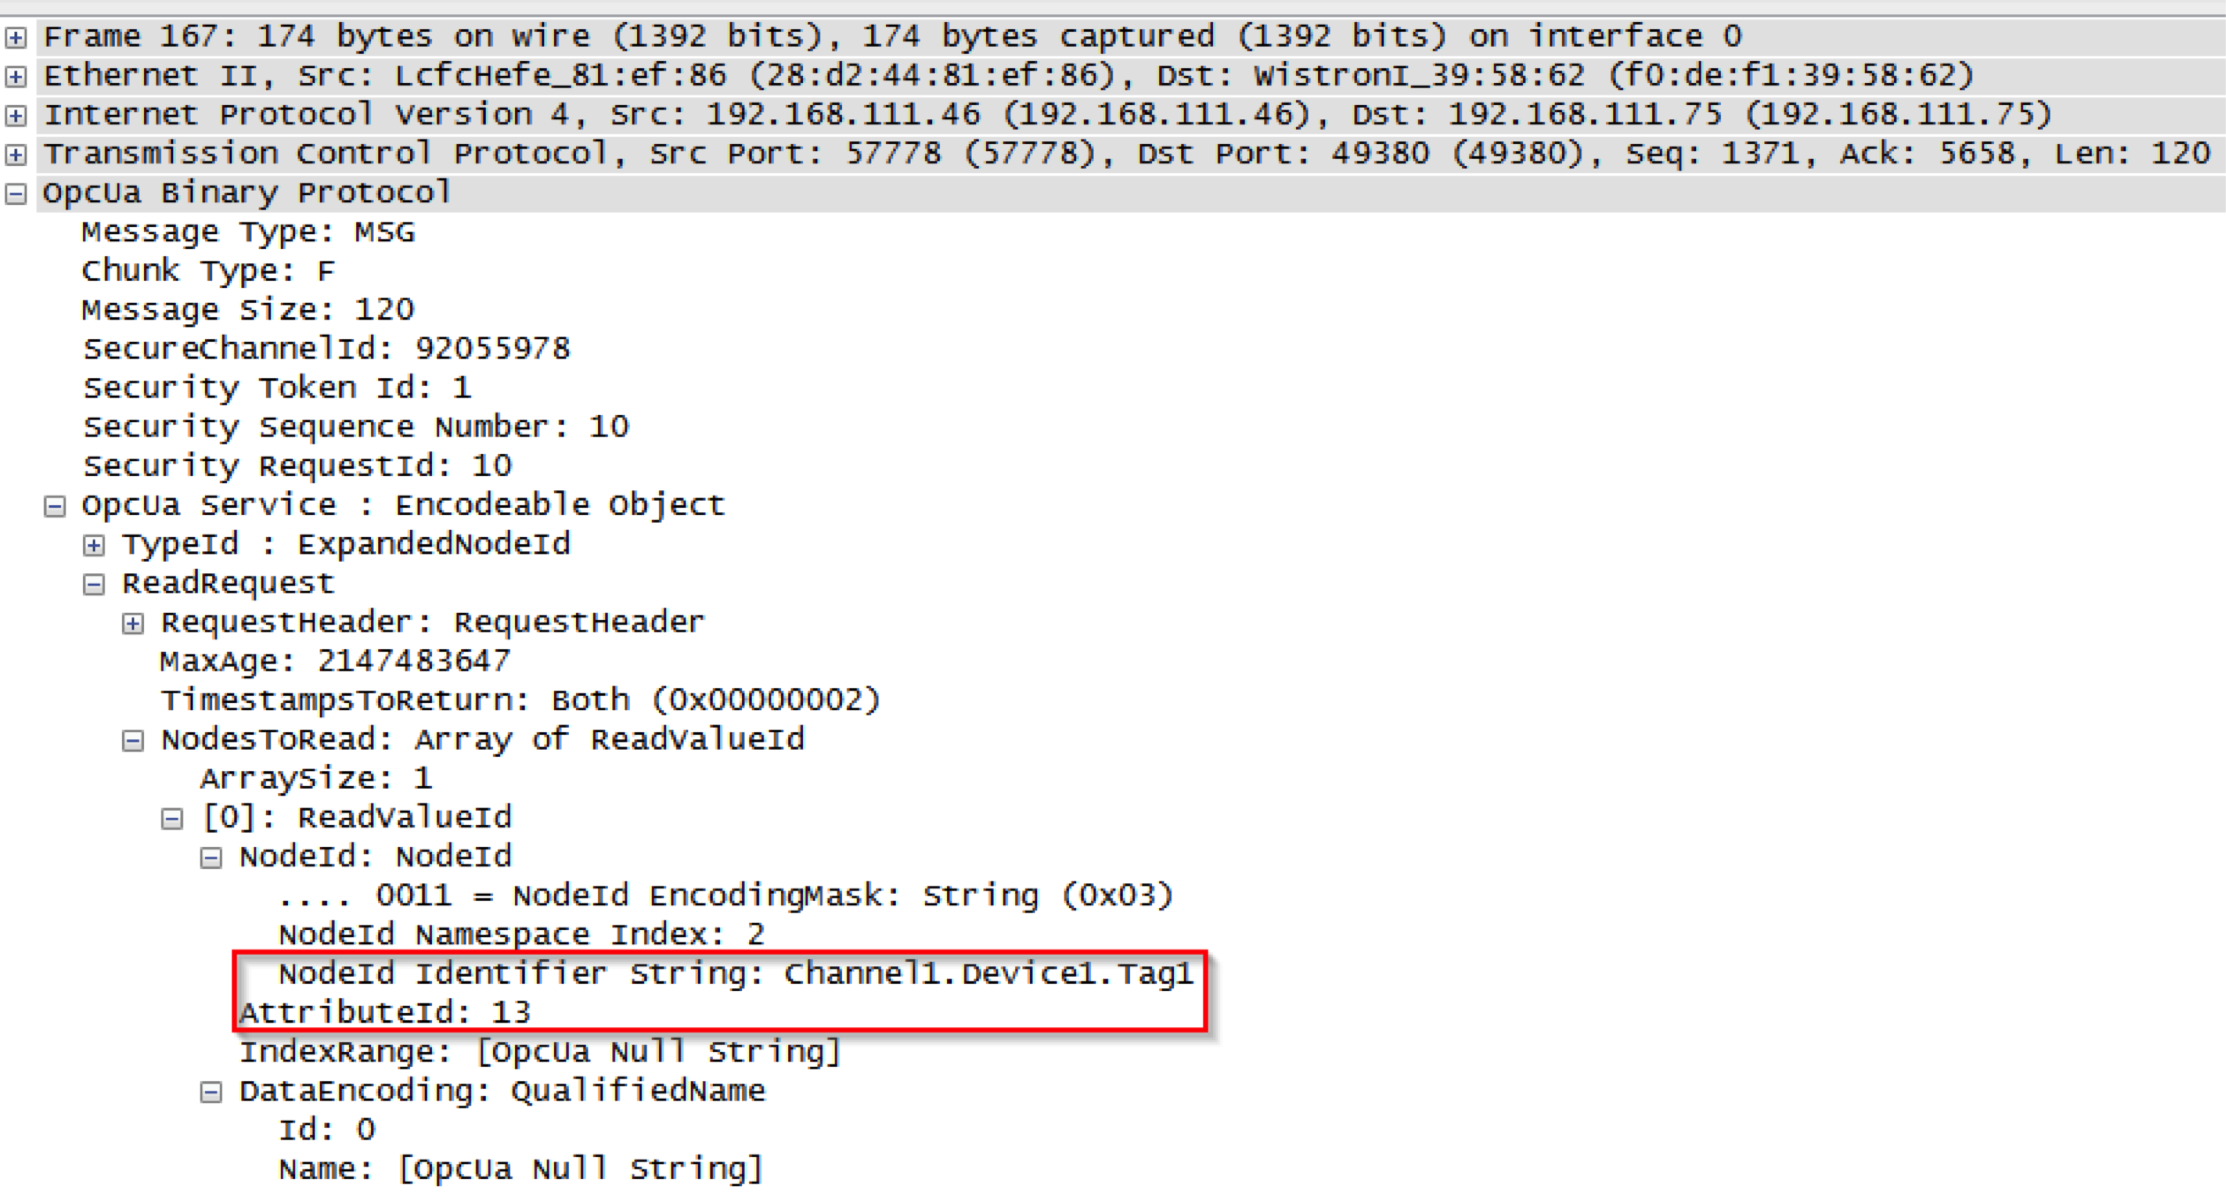
If we expand the frame, we can see that the client has requested to read AttributeId 13 (the value) from “Channel1.Device1.Tag1” in the OPC UA Server. From here, we could move on to the ReadResponse in frame 168 to see what the server sends back to the client’s request.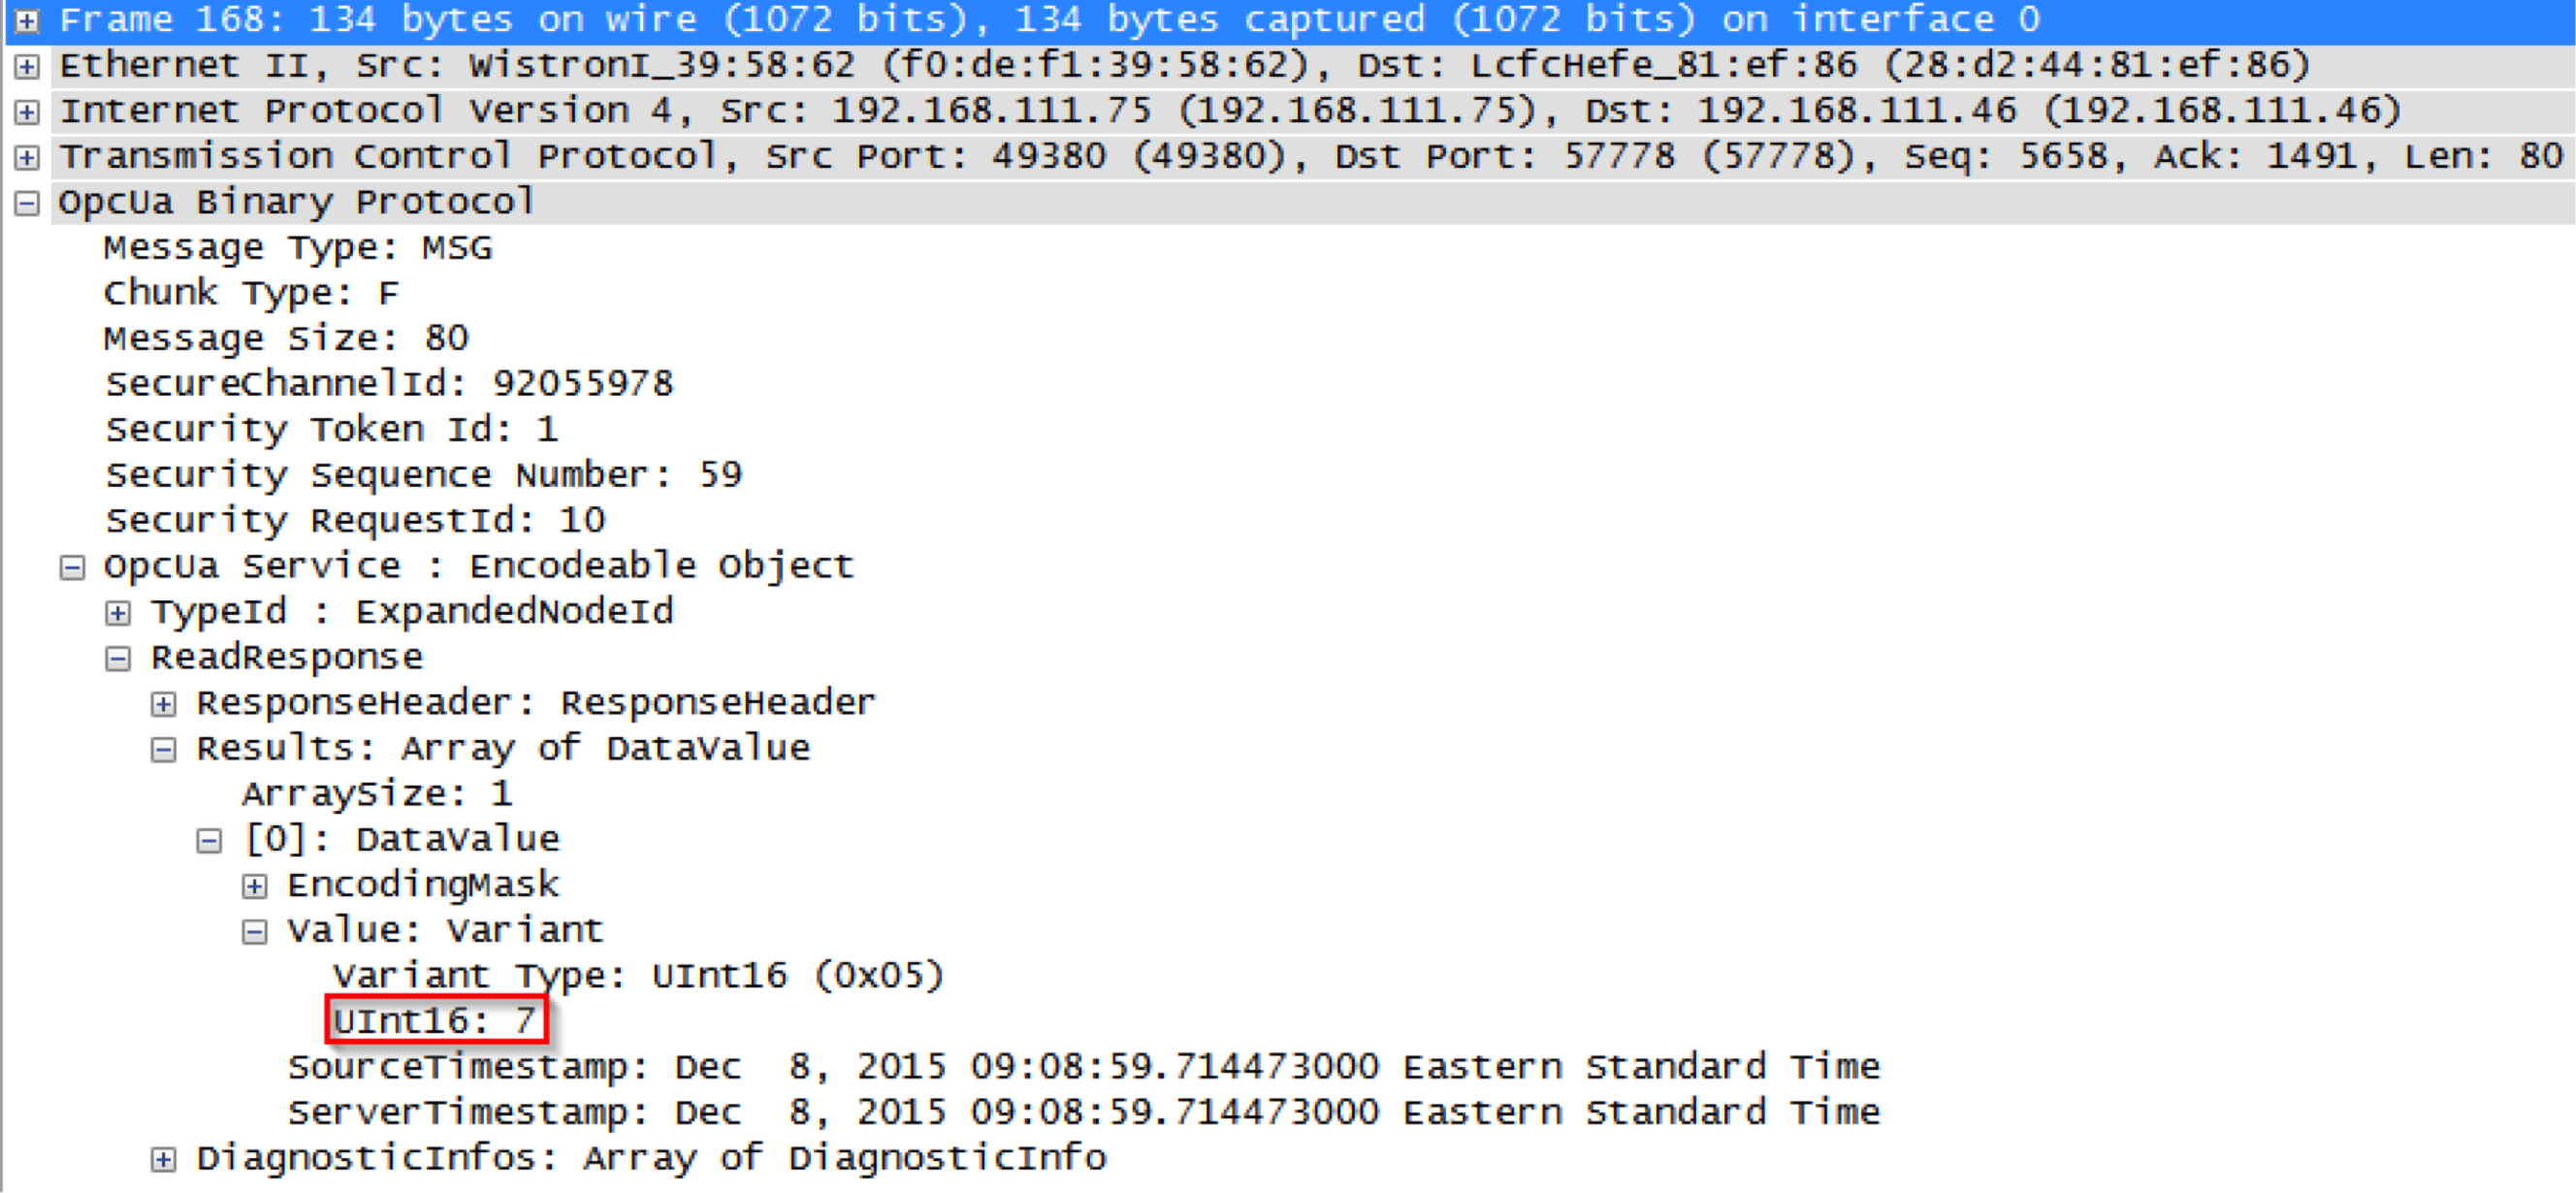
We can see that the server’s ReadReponse tells us that the value of “Channel1.Device1.Tag1” is 7. We can also observe that the elapsed time between frames 167 and 168 is about 10ms – a very quick response time! If the elapsed time was a large amount of time, then it might raise an alarm that the server is taking too long to respond – which gives us a direction to go with further analysis.
Being able to collect this level of information is an invaluable tool for engineers. It allows them to diagnose strange or unexpected behaviors between OPC UA Clients and servers and quickly pinpoint the problem.
To learn more about detailed analysis of OPC UA communications using Wireshark, including a packet-by-packet analysis of the communication between a custom .NET client application (developed using a Software Toolbox OPC Client development toolkit) and one of our OPC UA Servers – please click to download our free application notes.